|
|
|
|
|
In the Forums... |
Posted: March 5, 2002 Written by: Davey McWatters Asanté FriendlyNet 3004LC The final tab in the routers configuration software is titled Advanced. It has only a couple features but they can be very useful. Here is a screen of what the first couple of areas look like:  Some ISP’s require their users to submit the IP address of the NIC they will be using to connect to their broadband Internet service. If that is the case, then you will want to copy the MAC address of your NIC to your router to fool your ISP and make them think you’re still connecting via your NIC. The next button is Factory Defaults, it’s fairly self-explanatory, it simply restores all of the routers default settings just in case you screw something up. Pressing the next button, Restart Router, will do as it says restart your router. You must restart your router anytime you make a configuration change. Next we have the Upgrade Firmware button, this is used to update the routers software. This will be something you want to do to add security updates, new features, and bug fixes to your router. Previous routers I’ve used have had TONS of bugs when I first used it. After upgrading the firmware a few times it finally ironed most of them out. The upgrade firmware button is also used to overwrite your configuration file with a backup file you have saved. To back up a configuration file you simply press the backup setting button. It will then prompt you for a location on your computers hard drive to save the file. This is a nice feature to have just in case you crash and need to revert to a previous configuration file. Next we have the DHCP Server Setup area. This allows you to simply enable or disable your routers built in DHCP server. A DHCP server assigns any computers without an IP address an address from its IP pool. You can set the pool starting and stopping address areas by simply inputting a set of numbers between 1 and 254. You can also have your router assign your computers a domain name if you use one. Most people will not need to use the domain name area. The next area is titled Distributed Servers Setup and it looks like this: 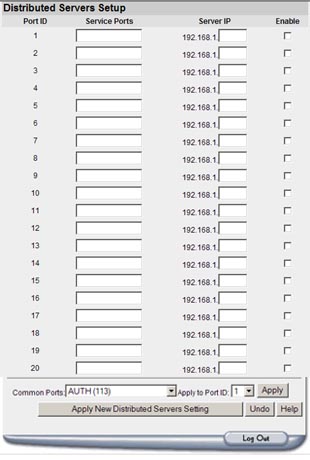 |
||
|
| |||
|---|---|---|---|