|
|
|
|
|
In the Forums... |
Posted: May 30, 2001 Written by: Tuan "Solace" Nguyen Putting it All Together (cont.) 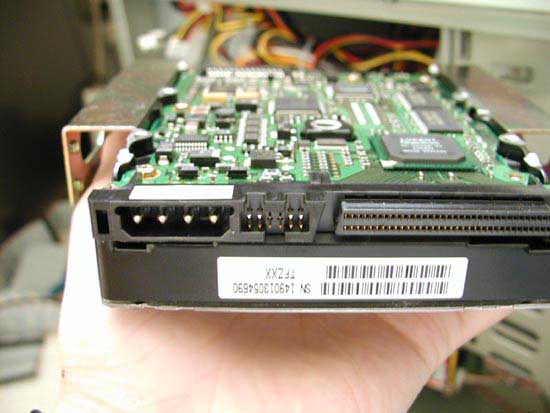 Before attaching the hard drives and the optical drives into the case, it’s wise to set their jumpers before hand. Since we’re using SCSI drives, remembering to set jumpers correctly is crucial. SCSI hard drives require you to set ID numbers where no two drives share the same number. Take some time and do this step correctly. If something doesn’t work after you’ve installed everything, removing the drives just to be able to clearly set the jumpers again can be a real pain. 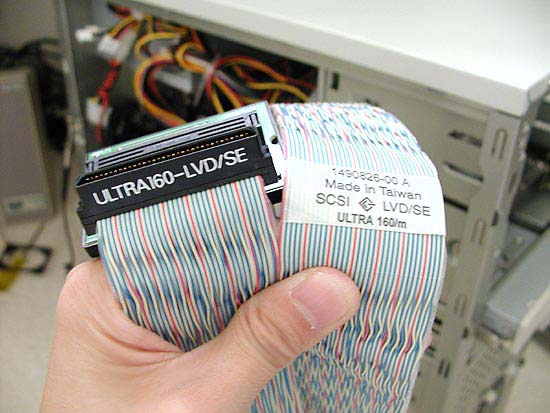 Because the hard drives I’m using for the server are of SCSI Ultra160 LVD (low voltage differential), it’s important to get the right SCSI cable to go with the drives and controller. There are many different types of SCSI and it can be a daunting task to figure out what belongs where and with what. If you’re using UltraATA 66 and or 100 drives, be sure to have some 80wire/40pin IDE cables around as using regular IDE cables will limit the drives to a burst speed of only 33MB/sec. 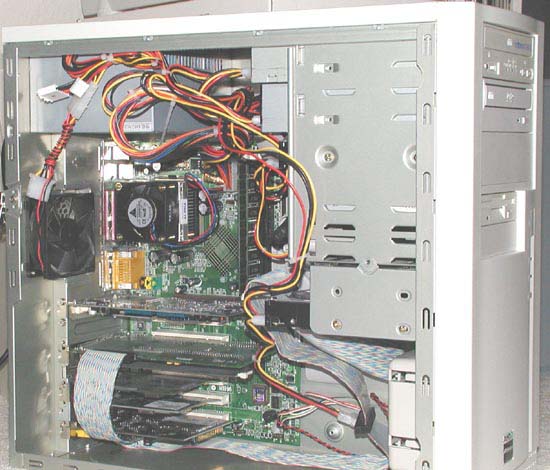 After everything is completed, we have what’s in the picture above! Everything is installed and cables are tucked away neatly to allow sufficient cool air to flow through the case. Before you proceed to close up your case, be sure turn on the server first just to see if everything is installed properly. If everything runs smoothly, seal the server up and begin the process of setting the RAID array -- if you’re using RAID -- and the operating system. |
||
|
| |||
|---|---|---|---|