 |
|
|
|
In the Forums... |
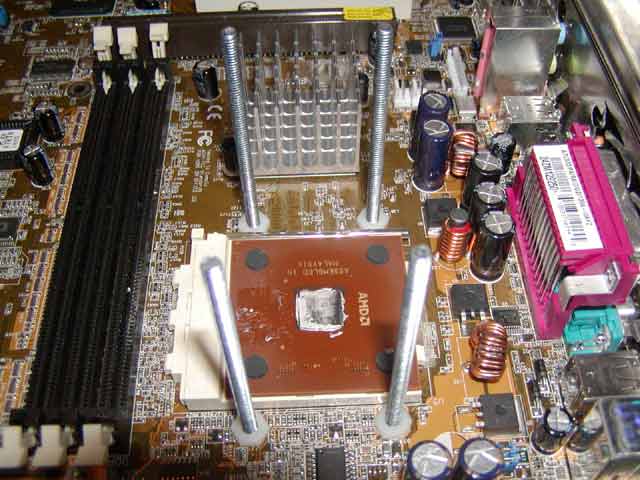
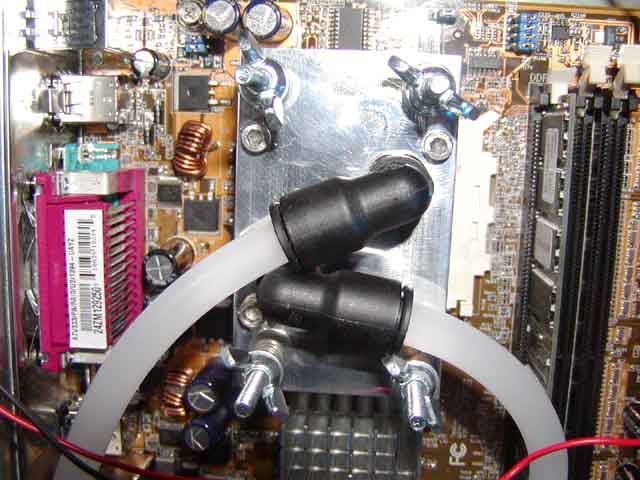
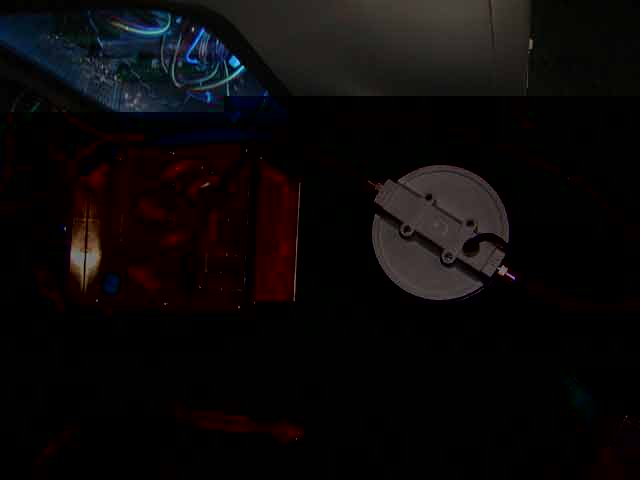
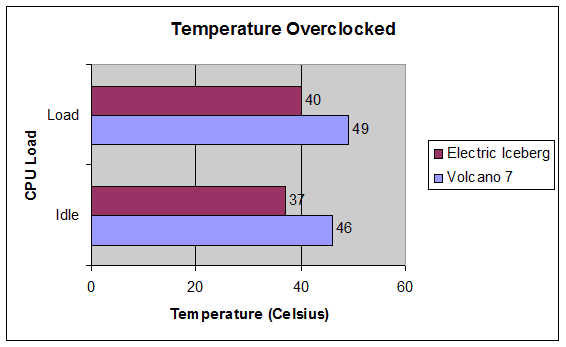
Posted: June 3, 2002 Written by: Davey McWatters Electric Iceberg Watercooling Kit Installation:  The first thing you should do is remove your old cooling device. Then you will need to completely remove your motherboard from your case so you can install the block mounting bolts. The Card Cooler includes four bolts along with four washers and four nuts for installation of the mounting bolts. You will need to put a plastic washer on each of the four bolts and slide them up through your motherboard. Then to hold them in place you need to screw the plastic washers down snuggly against your motherboard. After you have completed that you should have something that looks similar to the above picture. Now before you install the block on inside your computer, I highly recommend you cut your tubing, connect everything, fill it up with water, and turn it on. This will help you make sure that when you put it inside your computer itís not going to be spraying water everywhere. The best way to fill up with water is to fill the reservoir completely up, then turn it on and when it gets almost to the pump fill it up more and continue this process until you start getting the water back into the reservoir after it has made its journey through the system. After youíve tested for leaks you can being installing the system inside your computer.  After you have installed your mounting bolts, you can begin the installation of the block itself. Slide the block over each of the four mounting bolts. Then put one of the four included springs over each bolt above your installed block. Then screw your wing nuts in a criss-cross pattern down against the springs. The Card Cooler recommends tightening them 50% but this was not correct for my system. My Asus A7V333 has COP (CPU Overheat Protection) and when I had them screwed down to 50% my computer would come on and go right back off. So I tightened them more, stayed on longer. I eventually tightened them as tight as I could get them with my fingers and it proves to be the optimal performance setting for my system. Above is a picture of the block completely installed.  For most cases, the best thing to do is run your tubing through and empty PCI slot. I chose the top slot because there were no expansion slots taken up by the tubing, as the AGP slot takes up the 2nd spot down on the back of my case. Which slot you run your tubes through is entirely up to you though.  Once you have your tubing cut to the appropriate lengths you will need to run a tube from the OUT of your reservoir into one of the connectors on your water block. It makes no difference which one. Then you will need to run the other port of your water block into your radiator. Finally, run the last piece of tubing from your radiator to the IN on your pump. If this is your first water cooler install, you will most likely be very nervous to turn it on for the first time. If you properly checked for leaks; however, you have very little reason to be worried. It is most likely not going to leak now if it didnít before. Performance System Specs: Athlon XP 1800+ Asus A7V333 256MB PC2700 RAM MSI GeForce4 Ti4600 Important Note One thing you will have to remember about the temperatures is that they will be higher than most other systems report them. The Asus A7V333 reads CPU temperature from a diode inside the Athlon XP; therefore, it reports it more accurate, but higher than a motherboard, that reports temperature from an external thermal probe. That is the most important thing that you should remember when reading the data charts below.   As you can see, the Electric Iceberg does perform a great deal better than the Volcano 7. There are points where it is almost a ten-degree difference in the two cooling methods, which can be like night and day for overclockers. With and overclocked CPU, the temperatures barely change at all. The Electric Iceberg performs very well. It totally blows the Volcano 7 out of the water in terms of cooling performance. If you are looking for a water-cooling kit you defiantly should take a long hard look at the Electric Iceberg as it performs extremely well, and would be able to compete with the top selling water-cooling kits on the market. Conclusion One of the nicest features of the Electric Iceberg is the installation. The Card Cooler includes quick-connect connectors that hold the tubing firmly in place without the use of clamps or anything of that nature. All that is required is to push the clean cut end of the hose up into the connector and it will grip it tight so that it will most likely not leak. To remove a hose you simply press in on the front of the connector and the hose slides right out with a simple tug. This makes for a much easier and cleaner install than if you had to use clamps to hold your hose in place. As you can see from the charts, the performance is excellent. It cools in some cases nearly 10 degrees Celsius cooler than a comparison top end air cooler. Not only does it perform well, but it also looks very nice too. The block is made from copper and the lid is nice and shiny having a mirror finish. The reservoir is superbly crafted and designed. The radiator can be a bit big, however. The only things I didnít really care for about the unit were that with the radiator being so big that it wonít fit in most cases, the fan still uses a Molex connector and no Molex extension was included with the kit. The pump can also be a bit loud; however, this is only when I have zero case fans turned on. With my case fans turned on I can barely hear the pump at all. I also think they should include a way to automatically turn the pump on when the PC is turned on. This would help people that may forget to turn their pump on if they are used to air cooling. Overall, this kit is excellent. I would recommend it to anyone who is looking to get a good water-cooling kit. At $159.00, the kit offers excellent bang for the buck. It could compete with any of the top water-cooling kits on the market today. Give it a try for yourself, you wonít be disappointed. Pros:
Cons:
Overall Score: 9.5/10 
Home
=!--BEGIN FOOTER SSI DATA-->
|
||
|
| |||
|---|---|---|---|