|
Asanté FriendlyNet 3004LC
|
Posted: March 5, 2002
Written by: Davey McWatters
Asanté FriendlyNet 3004LC
Setting It Up
After you have connected cables from each computer on your network you are ready to begin configuring the router. Before you do this; however, you will need to make sure your TCP/IP protocol properties are configured correctly. You must either have “Obtain IP address automatically” selected or if you prefer to use a static IP address it must use the following format: 192.168.123.x where x can be anything between 1 and 253, it can’t be 254 or 255 because the router uses 254 as the routers IP address and 255 as the network broadcast address. After you have made sure all is correctly connected you can begin configuring the router, this is done via a web browser. You will want to type http://192.168.123.254 into your browser. This will take you to the router login screen that looks like this:

It will ask your for a password, the default password is admin. I recommend you change that for security reasons. I will discuss how to change it later in the article. Next you will be directed to the Setup tab which will ask you what type of connection you wish to use. This screen looks like the following:
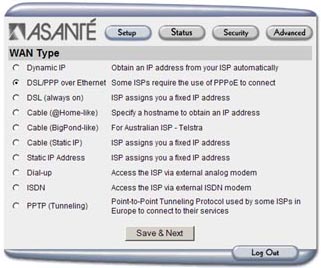
As you can see, there is a fairly large list of different types of connections to choose from. Dial-up is even supported on this router, unlike many others on the market. If you don’t know what type of connection you are using you should contact your ISP for the information. After you have selected your service type it will send you to another menu asking for information depending on your specific connection type. In my case, I have DSL/PPP over Ethernet; therefore; it asked me for my username and password. After you have input all of the information you will want to press the save button and click the restart router button, this will reboot the router and it will use your newly established configuration file. Upon reboot of the router you will be taken to the status tab of the routers configuration dialogue. It looks like the following:
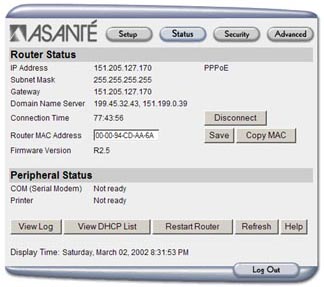
This is mainly an informative tab. It tells you information such as: IP address, subnet mask, gateway, DNS addresses etc. A few useful features in it include buttons to disconnect you from the Internet and to view log information. The log will tell you which computer on your network has tried to access everything that has been accessed since the last time the log was cleared. This tab also has a button to allow you to view a DHCP list. This is a list of all of the IP addresses automatically assigned to computers on your network by the router. That is basically all that you have to do to get connected to the Internet through your router, but there are still many, many more options that will be discussed.First we will take a look at the security tab:
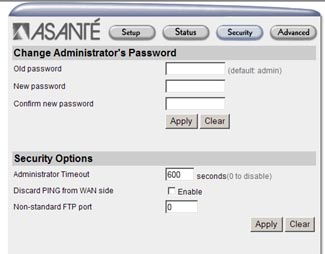
The first thing you will see on this tab is the area in which you change your router password. I recommend you change this immediately to make your router much more secure. If you forget the password that is ok because there is a way to reset it and it will restore settings in the router back to their defaults. Briefly, to reset your routers password you will need to connect your router to your computer via a null modem cable from your computers COM port to the routers. Then you will need to open HyperTerminal or similar program to access the routers console. After the COM LED on your router flashes you will need to press enter on your keyboard and you will be prompted with a >. To reset the routers IP address you can type IP or to reset the administrative password you will need to type PW admin and then push enter. Now you will need to type SR and hit enter to save the changes. The next area you will notice is titled Security Options, you will be able to set the administrator timeout time, the time it takes to kill a connection to the routers configuration software. You can also select discard PING request, which will block all ICMP PING messages sent to your IP address. The Non-standard FTP port will simply let you enter a port number you wish to use for FTP (file transfer protocol) if you don’t wish to use port 21. The next option you will see is the Port Access Control dialogue.
Next Page
|
|