Hard Drive / Memory Tweak Guide
Posted: February 11, 2001
Written by: Dustin "TimmyC" Jones
Introduction
The hard drive is one of the only pieces of PC technology that hasn't changed too much over the last few years. In fact, when you think about it, the idea hasn't advanced much at all. Sure, newer drives spin faster and hold more data, but compared to other hardware like 3D accelerators and CPUs, they haven't changed a great deal. The same can be said for memory in most ways.
Although being totally different in speed, use, and appearance, the hard drives and memory in a system are two things that cohesively work together. They are constantly sharing with each other and at times data access depends on the memory itself (through the use of DMA). This guide will help you get the most of your hard drives and memory.
Note: This was written on a Windows 9x system, with Windows 9x in mind. Most if not all of these tweaks should work with Windows Me, but as always; backup!
Regular Maintenance: ScanDisk and Defrag
Regular maintenance is crucial if you want to keep your hard drive running smoothly and error-free.
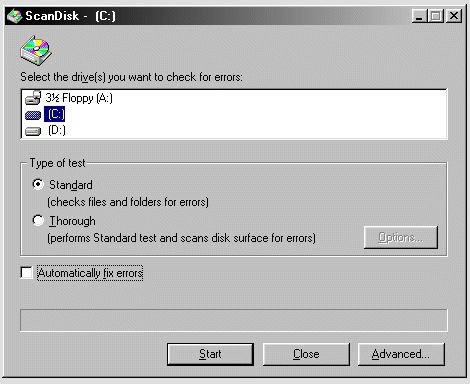
ScanDisk finds and repairs file errors.
The filesystem File Allocation Table (FAT) that has been used since DOS 1.x is somewhat inefficient in storing files, and it leaves chunks of them all over the drive (fragmentation), requiring more time to grab all the chunks and assemble them in memory. Defragging the drive will improve this. Thankfully, Windows comes with ScanDisk and a defragmenting utility, commonly just called "defrag". I'd recommend scanning and defragging a drive once a week, or biweekly at the least. Just doing those simple tasks will keep your drive putting along happily. You probably already know how to scan and defrag your hard drive, but if you don't, it's easy. To run ScanDisk you can just go to Start, Run, then type "scandisk" (hit OK). To defragment the drive, go to Start, Run, then type "defrag" (hit OK). You should probably run ScanDisk before defrag, because if there are errors found, the drive cannot be defragmented. It may take a while for each of these to run, so you might want to do it while nothing is running in the background, or when you'll be away from your PC for a long time.
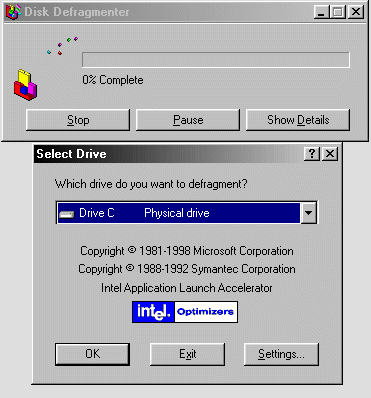
Defragging takes a while, but it really can speed up file access.
Keep the Drive Cool!
Hard drives, like any other PC component, can fall victim to premature failure if they are too hot for too long. Although some people wouldn't imagine a hard drive could have problems or even die from overheating, it is entirely possible. You've reached into your case before and touched a hard drive, right? Those suckers can get pretty hot! Having good airflow or even a cooling device made specifically for hard drives can help prevent problems. This may not apply to slower 5400 RPM drives, but 7200 RPM drives should be cooled or well ventilated; 10,000 RPM drives should definitely be cooled; and I think it's safe to say that 15,000 RPM drives should never be run without cooling.
Virtual Memory
Two of the most important tweaks for your hard drive are Virtual Memory and VCache. These two settings alone can make all the difference in the world.
Virtual Memory is basically an extension of your RAM. When windows runs out of RAM to use with certain programs, it sections off a portion of your hard drive to store the ones not actively in use, through a process known as paging. Unfortunately, some of the fastest hard drives are much slower than RAM, but paging is needed because the way Windows manages memory.
You can, however change the settings to be faster and tailor them for your system usage. Go to Start, Run, then type "sysmon" (hit OK). You should only be seeing Kernel Processor Usage up there unless you've played with this program before. At the top, choose Edit, Remove item, and get rid of this item for now. Next, go to Edit, Add item, and under Memory Manager add Swapfile size and Swapfile in use. Now go to file and click Start Logging. Save it to whereever you like so it can be retrieved later.
If you don't have System Monitor installed, you will need to install it from the Windows CD. To do this, go to Control Panel, Add/Remove, Windows Setup, and under System Tools, check System Monitor and System Resource Monitor. Now, head back and follow the instructions given above.
Go and do what ever it is you typically do during the course of a day. This will give a realistic estimate of how large of a swapfile you personally use. At the end of the day or half day, or how ever long you want to log, open the log file that you had created. Take the values of swapfile size and divide it by 1048576 (because the value in the log is in bytes, and you need it in megabytes.) then add about 20 MB to that number. Now, go to the Control Panel, then the System applet, Performance tab, and select Virtual Memory. Click 'Let me specify my own virtual memory settings' and put the value you have for both min and max.
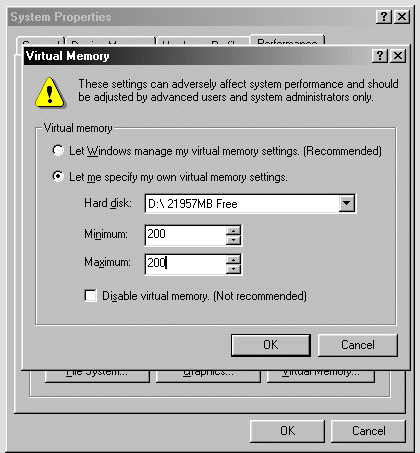
Locking the size of the swap file prevents Windows from constantly resizing it.
VCache & Cacheman
VCache is Windows' method of reserving system memory to cache programs. While a relatively good idea, Windows often uses more memory than necessary. This obviously is not a good thing, especially if you don't have very much RAM to start with. Thankfully, it is easily adjustable with a wonderful program from Outertech called Cacheman, which can be downloaded from Tweak Files here.
VCache is also adjustable through system.ini, but when there's an awesome program like Cacheman, why do it manually?
VCache consists of three items: MinFileCache, MaxFileCache, and ChunkSize.
The MinFileCache is just what it says; the minimal amount of VCache used.
The MaxFileCache is the maximum amount of VCache used.
ChunkSize is is the size of the memory chunks the VCache will occupy. This setting affects both performance and fragmentation of your drive if set too high/low. (Note: Fragmentation will only increase if you have a large Chunksize.)
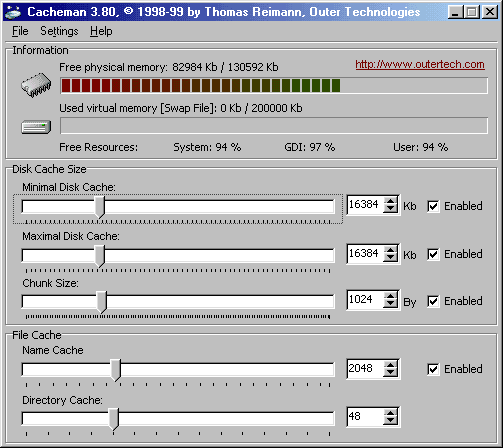
Cacheman is simple but works well for this purpose.
Depending on the amount of RAM you have in your system, VCache should be about 20% of your total system memory. If you have under 16mb of ram, I wouldn't adjust the VCache. The following settings are the 'ideal' VCache configurations using the 20% method:
| 32MB: |
64MB: |
128MB: |
256MB+: |
| Min: 6144 |
Min: 12288 |
Min: 25600 |
Min: 51200 |
| Max: 6144 |
Max: 12288 |
Max: 25600 |
Max: 51200 |
| Chunk: 512 |
Chunk: 1024 |
Chunk: 1024 |
Chunk: 1024 |
The settings above are only used as a rough guide to the best settings for you. You're better off to tinker around to find settings that are best for you and the way you use your system (Like I have with mine as you see above).
Cacheman also features many presets aimed towards certain uses for your system like Multimedia, CD Burner and Power User.
I'm sure you noticed the Name Cache and Directory Cache settings as well. Although they are not related to VCache in any way, the Outertech people included them. Name Cache is the amount of files that Windows will track or remember. Directory cache is the number of directories that Windows will track/remember. While this setting is not a big performance booster, it does save a bit of memory by fixing the size so Windows can't constantly change the values. The best overall values for any memory amount should be 2048 for Name Cache and 48 for Directory Cache. Once again, tinker with these settings until you find the optimal values for your system.
Enable DMA
Enabling DMA is a lovely little tweak that can most new users neglect to enable. DMA stands for Direct Memory Access. What that means is that when enabled, the device using DMA will ignore the CPU and directly interact with the system's RAM. If you have a hard drive over even a few gigabytes in size, there's a good chance it will support DMA. In fact, almost any newer drive will support DMA, so unless you have a really old hard drive, you should be able to enable DMA with no problems. If you really are not sure, you can check the manufacturer's website or the manual to ensure its DMA compatibility.
To enable DMA, go to Control Panel, then the System applet, and then Device Manager. Next, go to disk drives, and select your hard drive(s). Go to settings and check the DMA box. There you go! Now the hard drive can send data directly to RAM, without bothering the CPU for IDE controlling.
System.ini Tweaks
Now, open up system.ini (Start, Run, "system.ini" (hit OK)) and get ready to put a bunch of settings under the [386Enh] section.
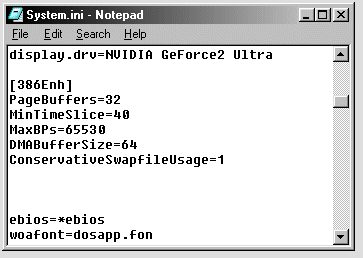
System.ini contains numerous system settings.
PageBuffers=32
Changing this setting from the 4k default up to 32k will boost your performance by increasing the page buffers used to store read and write information.
MinTimeSlice=40
This setting changes the time in milliseconds that Windows allows a Virtual Machine to run before another will begin to run. Originally 20.
MaxBPs=65530
This setting is used to adjust and set the size of 'break points' that Windows uses for its VMM (Virtual Memory Manager.) This setting is in bytes.
DMABufferSize=64
This setting assigns out the size of the 16bit DMA buffer for all DMA devices. The maximum size is 64 and the default size is 16.
ConservativeSwapfileUsage=1
This has to be one of the most valuable tweaks in the system.ini file, and it's another one of those give-it-away-in-the-name tweaks. :) This tweak disables the 'PageFile_Call_Async_Manager', which allows Windows to write out the swap during an idle in the Vfat. In other words, Windows will attempt to use your physical RAM as much as possible, and only write to the swapfile when the hard drive isn't busy. Those of you still running Windows 95 don't need to change this, because it is automatically disabled in '95.
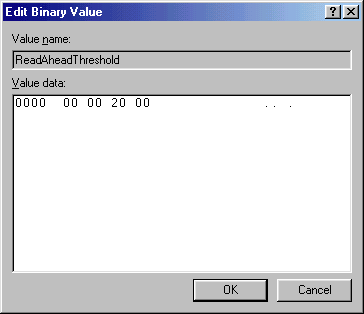
Read Ahead
Windows supports a neat little feature called Read Ahead. Read Ahead tries to predict what files will be called next while loading a program. Now, this is a good idea on paper, but unfortunately, Windows sets this value to 64k, which makes it a tad useless, considering the massive size of files that most modern programs are using. However, you can change it by going through the registry.
Open up Regedit (Start, Run, "regedit" (hit OK)) and navigate to [HKEY_LOCAL_MACHINE\System\CurrentControlSet\Control\FileSystem]. From there you should see a setting that says ReadAheadThreshold. If you don't have it, no worries; just download this small .reg file (unzip it, and then simply double click the readahead.reg file) and it will merge the correct value in for you.
To create it manually, right click in the key window and select new binary value. Type in ReadAheadThreshold (Case sensitive). Now, right click on that setting and select "modify". You should see a dialogue box similar to the below picture, except empty. Now just add 00 00 20 00 into it and click OK.
 Also, keep in mind that one of the best ways to keep your system running smoothly is to limit the programs and device drivers upon bootup. I strongly recommend that you take a look at the system startup guide and other tweak guides here at T3D to learn how to maximize your free memory on startup. Every bit of memory saved in the beginning counts in the long run!
Free Up Some RAM!
If you have just run an intensive or specifically large application or game, you know about that groggy feeling your system can have. That's usually because of the leftovers taking up your valuable memory. You can free it, however, by clicking your heels together 3 times and saying: "Let my memory go." Er, I mean, using a program to free that trapped memory. There are many good programs to do this at Tweakfiles.
If you don't want to download a big fancy program, you can actually make one yourself very easily using Visual Basic runtimes (you don't even need VB to do this).
Here's what you do:
Open up Notepad (Start, Run, "notepad" (OK)). Depending on how much memory you have, put the appropriate values in...
Under 128mb Ram:
Mystring = (16000000)
128mb or More:
Mystring = (80000000)
Save it as "Memory.vbe" (including the quotes!). Close as many programs as you can, then run (double click) this handy little script to free your memory whenever your computer is feeling sluggish.
If you have trouble running it, you may need the Visual Basic Runtimes. You can get them here.
Conclusion
Whew, what a read, eh? With all those tweaks you should now feel like you have a brand new system. Ahh the wonders of tweaking....
Want to return to the normal guide? Click here!
All Content Copyright ©Dan Kennedy; 1998-2000