System Cooling and Case Cutting
Posted: February 21, 2000
Written by: Dan "Tweak Monkey" Kennedy
Introduction
With modern PCs, cooling isn't an option, it's a necessity. I'm not just talking about CPUs or video cards -- you should have additional cooling in your case. Fortunately there are several affordable cooling solutions available that really help solve the heat problems in your case. However, if you're just putting a big fan in your case without any sort of extra ventilation you're not going to get the most of your fan. This guide will help you decide on what size fan to purchase or use, where to place the fans, and it will show you how to cut holes in your case to maximize airflow.
Note - This guide was written with the assumption that your case is fully assembled with all the front/back/top/side pieces in place. Take caution when following this guide. We take no responsibility for damage it may cause!
Parts Checklist
Maybe you like your PC and you spent a lot of money on it, but in this guide you're going to cut it up and screw holes into it. Is that a problem? Here are the parts you'll need to get started with your cooling system:
-At least 1 fan:I recommend an 80mm fan or larger to help move a lot of air. Just remember that the bigger the fan is, the bigger the hole in your case needs to be. Also keep in mind that the more fans you add, the more power you're going to draw from your power supply. For this article, I used a Card Cooler, disassembled into its parts: two 80mm fans. The rails and screws were not used. You can find an 80mm fan at a computer store, radio shack, etc., or you can do what I did and just take The Card Cooler and rip it to pieces.
-As many bolts and nuts as are required to mount the fan(s) completely:As I mentioned above, for this article we used two 80mm fans and the perfect bolt size was: 6-32 x 1 1/2". These can be purchased at a hardware store for very cheap (maybe a dollar or two for all the bolts and nuts you'll need).
-Fan grills (optional):Not only do grills protect your fingers and other objects from getting chopped by your fans; they also make the case cutting job look damn snazzy and professional. We got grills from The Card Cooler Shop. The price is $3 for 80mm, $3.25 for 120mm. Wait till you see pictures of the finished product and you'll want some! :)

That's all for the required parts. Remember, all we're doing in this article is mounting fans and cutting holes for them.
Tools Checklist
The tools will be harder to come by than the parts, most likely. You'll need ONLY ONE of the following to cut the holes:
-Round, metal cutting blade for a drill (and a drill, of course):If you have a drill and want a perfect round hole and you have money to spare, you can head down to the hardware store and buy a circular blade made for cutting metal holes. These are quite expensive and when we went to the store to check prices, they ranged from about $15 for a 60mm or 80mm size to $25 for a 120mm size.
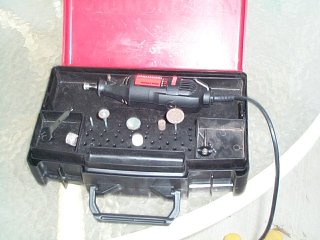
-"Dremel" style tool with metal cutting blades and grinding wheel:This is what we used for this article. If you have a Dremel style tool, we recommend this method because it's pretty fast and gives a nice even circle if you're careful. Here's what our tool looked like:
Here are what the metal cutting blades look like:
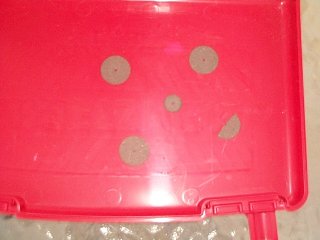
See the size of the piece in the center compared to the others? That's how small these babies get after about 5 minutes of cutting. And they break sometimes too, so wear safety goggles! :)
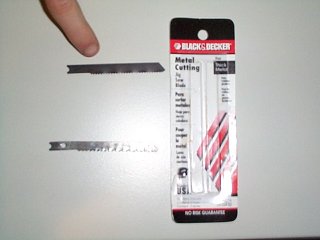
-Jigsaw with metal cutting blade:A jigsaw works pretty good for this task if none of the other cutting tools are available. Make sure it has a metal cutting blade. If you don't have one, they cost about $2.00 or so from a hardware store. Here's the metal cutting blade we purchased:
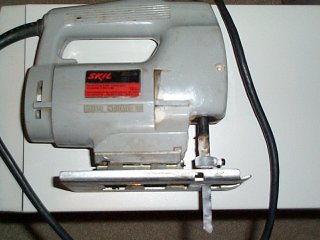
And here's the ol' jigsaw:
-Drill with metal bits (optional):If you're cutting in a place that doesn't already have holes for your bolts, you will need to drill holes. This is a very easy task if you have a drill and metal cutting drill bits. Find a drill bit that's approximately the same size as the bolts, then put the fan in place and hold it very secure. Drill through the fan's mounting holes and into the metal. It may take a little pressure to get it through. When you're done, smooth around both sides (inside and out) where the metal may have popped up a bit.
In addition to having one of the cutting tools mentioned above (and possibly a drill), it would be a good idea to use something to smooth the edges when you're finished. We used a Makita drill with a large wire brush bit. This smoothed the edges so you could touch them without feeling any rough edges. A fine metal file will also do the trick. There are other tools that can be used, of course. Be creative...
Fan Size
There are several different types of fans and sizes available. For this guide we're using 80mm fans, but you might want to use something bigger. I highly recommend 120mm fans because they move about 90CFM, each. This is quite a bit more than an 80mm fan and definitely a lot more than smaller fans. Here's a picture comparing the fan sizes:
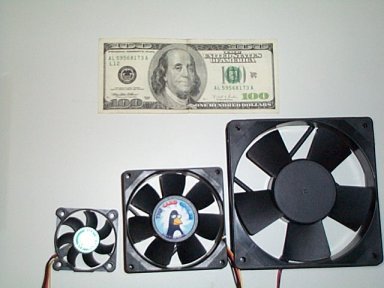
(Excuse the cheesy $100 bill, we used it so you would see the difference in size only)
From left to right, 50mm, 80mm, and 120mm ball bearing fans.
Fan Placement
Deciding where to put the fan(s) isn't always an easy task. You have to take several things into consideration. First, where is most the heat in your case? In a tower case, the heat is usually concentrated in two areas: the top, and near the expansion slots. The reasons are simple: heat rises (right?) and the cards in your expansion slots create heat without having any fans to push the "stale" air around.
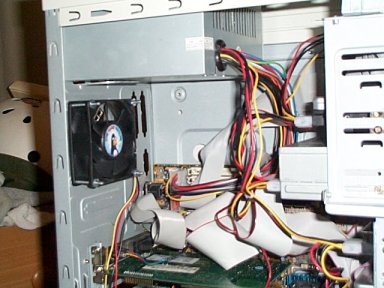
In my mid-ATX tower, I decided to put two 80mm fans at the very top of the tower, next to the CPU. In fact, the fans are within inches of the CPU and blow a lot of air OUT of the case (hence the term, "blowhole"). This is very efficient, but since I sit next to the computer, I get hit with a lot of air at all times.
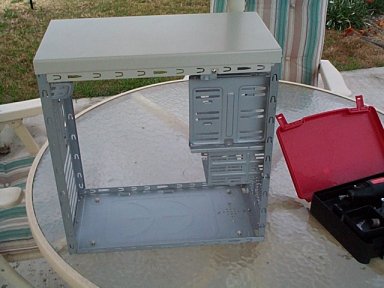
For the project case, we decided to put one 80mm fan in the front, and one 80mm fan in the back. Once we decided on the spots to place the fan, we stripped it down and took out everything. If you're not cutting anywhere near the motherboard or cards, you can probably get away with just removing certain parts of your case. However, be sure to cover the parts with a towel or something to prevent the metal from being blown into the parts. Here's a picture of our stripped-down case:
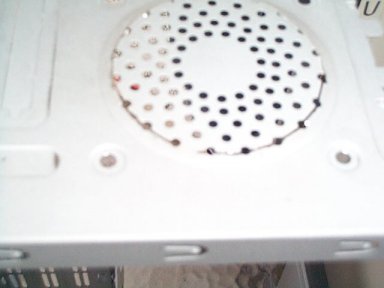
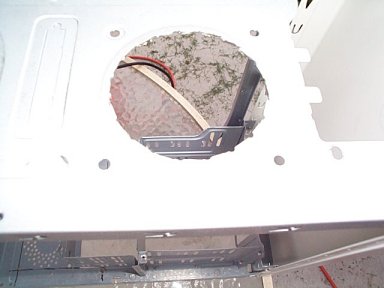
A lot of times cases will have holes where a fan (usually an 80mm fan) was intended to be placed. See:

These block a lot of airflow (up to 60%), and since they are very easy to cut-out with a Dremel tool (or the tool you decided to use), we cut it out.
When you have decided where to cut the circle for your fan, draw an outline so you won't make an ellipse. There are several ways to draw a circle on the metal, but the best tools are usually a compass and a pencil. If you don't have a compass, look around for something that's round and is approximately the same size as your fan's blades. Once you've drawn your circle, it's time to cut.
Cutting Your Case
Now that you've got a circle drawn on your case, it's time to cut it up. Don't be afraid... it won't hurt it much and it will look very cool when you're complete, and it will serve a practical purpose.
If you haven't done so already and you need to, drill holes for the bolts as mentioned on page 1.
If you have a Dremel:
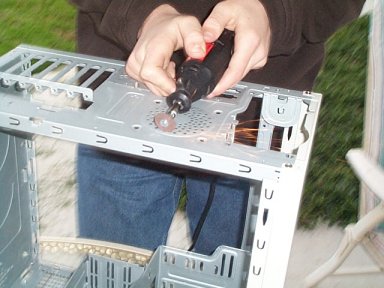
Now, if you're using the dremel technique, you should just start cutting into it. Make sure to wear safety goggles or some sort of protection. Here's a pic of us cutting up the case using the dremel:
After cutting it out most of the way, this is what it looked like:
Just a few more holes and it fell out. See how rough the edges are before smoothing:
No matter which tool you used to cut the hole, it should look something like that now. If it isn't very round, don't worry... the point is that there is a large opening and it will still help move air.
Otherwise:
If you are using a large metal-cutting circle blade for a drill, you should just be able to start cutting. If you're using a jigsaw, you will need to start a hole with a drill or something else. Once the hole has been started, you can cut into it and start cutting into the circle pattern you drew on the case.
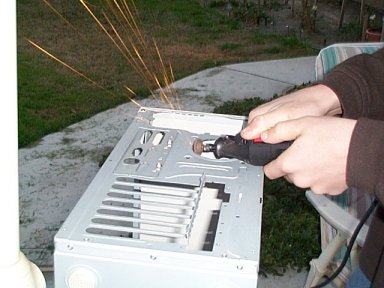
Smoothing Edges
Remember that whenever you are cutting metal, there are bound to be sharp edges. This is especially bad with a jigsaw or dremel. To smooth out the edges, use either a file or a metal grinding wheel. Fortunately, the dremel had a grinding wheel attachment. This worked pretty well (except for the sparks that shot everywhere) and helped to smooth down rough edges and burrs. Here's a pic:
As a finishing touch, we used a Makita drill with a large wire brush attachment to make the edges especially smooth and clean. Also we polished up the area to give it a fine chrome look. This was very easy to accomplish as the Makita has a lot of power. Once this was done, you could rub the edges without even scraping your finger:
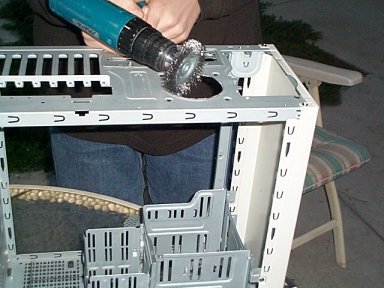
If you don't have a Makita drill and a wire brush attachment, this can be done with a small, fine file.
Putting It All Together
Now that you have a hole in place for the fan, and you have holes drilled for where the bolts line up, it's time to put it together. First, reassemble your PC as much as you can before sticking the fans into place so you can be sure they will fit snugly without problems. Do you want the fan to blow air in or blow air out? You will have to decide this on your own. If you have one fan blowing in, it's a good idea to also have one blowing out to circulate air. Line up the fan with the mounting holes and grab the bolts/nuts you purchased from the hardware store. If you have a grill for the fan, you'll need to line it up on the outside, as well. When they are lined up, feed the bolts through the grill and the fan itself. Do this with all four bolts (per fan), then put the nuts on the end and screw them in. Don't screw them in too tight because the fan probably is mounted with plastic. Here's the inside of our test case now:
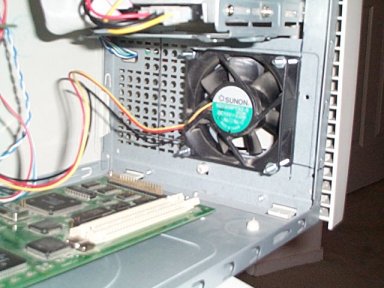
The front fan is blowing air into the case and...
The rear fan blows air out of the case.
When you've mounted all your fans, make sure to plug them in. Start up your system when you're sure everything's ready and start fraggin'!
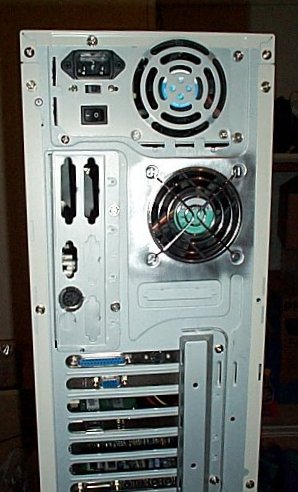
Conclusion
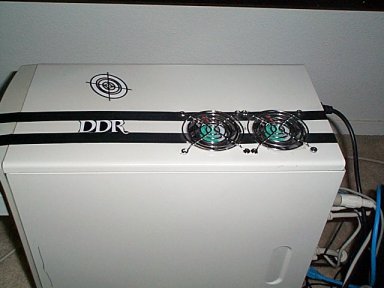
Here's what the case looks like now, with the polished chrome style back, and the fan/grill in place:
Here are some shots of my main PC that we used a similar case cutting approach on, along with some other things to spice it up:

Well folks, that's all for now! I hope you enjoyed reading our System Cooling and Case Cutting guide. And if you enjoyed this guide, just wait till you see what we're working for next time! :)
Thanks go out to Greg "Dyre" Heasley for bringing tools and volunteering his fingers to be chopped off.. heh..
Want to return to the normal guide? Click here!
All Content Copyright ©Dan Kennedy; 1999